Doug and his mini me, Henry, started by opening up what was originally a closet and wiring it for appliances and lighting. The closet was built upon the floor joists of the family room. To allow for everything to be at the proper height, we found a carpenter to cut the joists and reinforce them in the basement. This enabled the pantry floor to be flush with the landing.

When we renovated our kitchen a few years back, I was really bummed I couldn't afford the real linseed linoleum I had hoped to use. The shipping alone was prohibitive. So, I went back to the drawing board and decided to paint the floor to mimic a checkered look. It was sort of a long and back breaking process but so gratifying.
 Not much required for this project. A straight edge, mine is a four foot meal number. A small ruler, utility knife (for trimming tape) and delicate surface painter's tape. You want to use basement/garage paint for this project so it wears well.
In the kitchen I used inexpensive pine flooring, what was in the original kitchen decades ago. This pantry is located at the top of the basement stairs and at the entry of an exterior door so I used a more durable oak. Roll on primer then paint with two or three coats of the lightest color.
Then using the straight edge find the center of the space and measure out a 12x12 square - a cheap peel and place tile helps with this. With a pencil and straight edge lightly extend the lines in all directions to create a grid pattern.
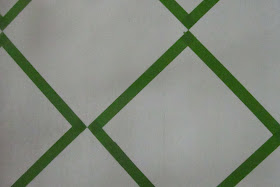
 Taping the squares requires patience. Most importantly remember to tape OUTSIDE the square to be painted with the darker color.
Since this was a small project, I chose to brush it but you can certainly roll the squares, too.
Finally, you may want to seal the floor with a coat of varnish. I suggest water based since the oil based will yellow. I didn't seal the kitchen floor immediately because I wanted it to look like it had been around for awhile - now it does. Now it really does.
Many weeks or more accurately months later....

A beautiful beverage refrigerator, an actual place for paper recycling and an extra shelf for the blender and pannini maker.
 Cue the choral angels - a microwave! The extra counter space makes a great bar when entertaining.
And my favorite element - display for my vintage bowl collection.
One project down. 968 more to go.
I'm impressed! Don't you love making your house a home?! It's a wonderful experience (with a touch of back/bank breaking). I do love your kitchen!!!
ReplyDeleteIt looks incredible!!!! I am so jealous. The bowls look great. I will email/call soon. Lack of sleep killing me.
ReplyDeleteOkay, let's try this again. I guess I am not good at this - second attempt at posting.
ReplyDeleteLove the new addition to the kitchen. Lot's of hard work but looks well worth it.
Do you know anything about the brown bowl on the second shelf left side? I have two that I got from my Mom. They nest. There are no markings on the bowls but I know she had them for a long time. If you know age, or anything I would appreciate it. I also have a pitcher made in the brown pottery. Could not find anything out there since I really have nothing to go on and since my computer skills with the web are not the best :). Thus no info.
Thanks!