Showing posts with label food projects. Show all posts

Wednesday, April 4, 2012

Winter Market Score


Who says you can't get cool stuff at a winter market in the Midwest?

Earlier this year, one of my favorite vendors had some ginormous yellow citrus fruits. I asked what they were, while simultaneously digging for money. Ponderosa Lemons, a hybrid of lemon and citron had found their way to my market. This slow growing tree had lived in this generous grower's green house for 20 years and she was sharing this wealth of unusual citrus.

I bought as many as I could, without being piggish and without a clue what wonderful thing I would do with them. It immediately became clear my food project needed to be one utilizing all of the the fruit, not just the juice. I wanted to taste them in different ways. Preserving the flavor to enjoy it for a long time would be a bonus. Who knows when this gem would come my way again?

I started with candied citrus. Though you may think it lame, it's one of my favorite treats since a childhood. With the fruit I made my first marmalade incorporating oranges and pomelos  (more on that soon.)


It's a truly simple project and may be made with any type of citrus. You'll find a recipe most anywhere. This one is more traditional but a version like this would be fun in the rosemary-lemonade cake suggested by the same cook. They fancy-up a simple cake like this yellow house blast from the past, too.


A toss with superfine sugar makes them sparkle.


The security of a jar full.


The pleasure of a handful.

Thursday, January 19, 2012

Memories in the Grocery Store Aisles

Does anyone remember the Brach's bulk bin in the grocery store? Bins of candy bought buy the pound; as a child the temptation to sneak just one was great. The hope mom would give change to put in the locked metal box allowing you to pick was palpable. Sour balls, bull's eyes, Sunkist jellies, root beer barrels, caramels and Neapolitan.

In the summer, my grandmother would host four grandchildren and there was always copious amounts of ice cream. Not just any ice cream - Neapolitan ice cream. Not usually a favorite of mine but she scooped your bowl to order. Lots of chocolate, some strawberry and a little vanilla. At the end, the cardboard half gallon container had deep wells surrounded by the remaining flavor. Just a really cool thing Grandma's can do that a mother never would. It made the ice cream so much more delicious.

It never occurred to me to make Neapolitan candy but when I happened across a recipe I had to try it. So many of my memories are tied to food (or is it the reverse?) and this candy of acquired taste is a fine example.

Especially fabulous if you are a coconut freak, this candy covers all bases with vanilla, chocolate and er...pink. No mind because its striped results are a tasty blast from the past. With all its assumed kitch, the recipe includes vanilla bean seeds. Classy.


Melt white chocolate with sweetened condensed milk and vanilla beans seeds. Be sure to save those pods for the extract bottle or sugar bowl. Once it's melted smoothly, fold in the shredded coconut.


This white love is divided into three parts. One third becomes a lovely shade of pink. The last is flavored with best-quality unsweetened cocoa,


I used an 8x8 pan lined with the wonder-stuff called quick release foil. Chocolate. Vanilla.


Then pink.


After a setting period, it's ready to cut into rectangles and be coveted by old Gen X-ers. My homemade had softer, smoother and more consistent texture. And, just as I recalled from childhood didn't really taste too chocolatey or vanilla-y or pink.

Bummer. In my excitement and Christmas nirvana - I never took pictures of these little goodies cut up and stripey.

But the next time you're at the grocery store, hit up the bulk bins. Don't forget your 33 cents to put in the locked box. They'll look and taste same but with presumably with more filler-crap.

You could make your own by consulting Martha recipe.

Either way, it's worth a walk down memory lane.

Thursday, November 3, 2011

Yellow Tomato and Basil Jam/I Love Food In Jars

One night I stayed up late working on a blog I was really excited about. A few key strokes....and it was gone. In the blogshere, never to be seen again. Or so I thought. While tweeking a few things I recently happened to notice a blog written in 2001. In 2001, I had three very busy children 5 and under. To say the house was a "fixer-uper" is generous. If I had a computer I don't know where it was. I had struck gold (or yellow) and found my missing story.

Though no longer seasonal, this humble homage to one of my favorite bloggers needs to be published. If you aren't a food preserver hopefully you'll be inspired. My advice? Remember there truly is no season for canning.

*****

Marisa, the writer of the fabulous blog, Food In Jars reads my mind. Something exploding in the garden? Went a bit nut-so at the fruit stand? No time to search for the the answer to "what should I do?"  Food In Jars saves the day.


Several weeks back the yellow tomatoes were taking over the yellow house. The red ones I could manage but the yellow I am certain were reproducing on the kitchen counter in the night. I love a good yellow tomato but honestly, I prefer a more acidic bite. So while I diligently ate a tomato sandwich every day they were getting the best of me.


Marisa had my answer. Cut, add sugar and macerate for 24 hours in the fridge. I love food projects with easy steps that allow you time to fully commit.


A bit of cooking and brightening with lemon zest.


I can't get better. No, wait - it does. Boat loads of basil growing on plants pressed between monstrous caged tomatoes? The crowning glory.

I told you she was good.

I know it is late but if you get your hands on a bunch of yellows and are sick of fighting the basil you really need to try this it's delicious. It's applications are endless. Or maybe just remember next year when there are illicit things happening on your kitchen.

Did I mention it's Food In Jars?

Thursday, October 27, 2011

Piles of Plums for Cordial

I know, I know. Plum season lasts about 5 more days. (if you will) Though time is limited, if you can still find them, this delicious sip is worth it on a cold night and the perfect Christmas gift. I bought a ton of plums this season - my fruit compulsion raises it's ugly head....again.

Before their delicious transformation, they were stunning in a vintage orange bowl on the dining table. Lovely.


I decided to make a wine cordial with part of the booty. The appeal of this recipe is allowing the crushed fruit to macerate with the sugar in the fridge for a day. I think I may have taken two with no ill results. As I've said before the multi-step/day processes suit my life perfectly and allow me to attempt things I might other wise pass up.


A bottle of red wine poured into the sweetened fruit and a cup of brandy rounds out the mixture. Back into the pickle jar (Uh, I mean aging container) Thank goodness Grandpa buys the "jumbo" jars of dills for the kids.


Let the fruit infuse the liquid for a few weeks. Once it's done, strain the solids through a sieve gently pressing so you don't lose a drop. An extra straining through butter muslin ensures no bits of pulp in the finished product.


The amethyst color is divine. Sweet and smooth. It warms you to your toes. Before too long we'll really want our toes warm.


Hurry! Go! Buy plums!

Plume Wine Cordial

2 1/2#  plums, pitted and coarsely chopped
2¼ cup sugar
1 bottle of fruity red wine
1 cup brandy

Mash plums and sugar together dissolved. Add plums and all other ingredients to a large jar (pickle size is good) and allow to age for 3 weeks. Shake the jar several times during the resting time. Strain the liquid through a sieve, gently pressing on the solids to extra as much liquid as possible. Pour cordial through a funnel lined with butter muslin in to a clamp top bottle. Let it rest another several weeks. The longer you wait the better it is. An early nip is okay, too.
 

Friday, August 19, 2011

Hip Girl in the Yellow House!

It seems I have been away from my blog for quite a long time. We've been busy in the yellow house getting ready for school, spending every possible moment with friends, settling into the coolness of high school and swimming at the quarry. For my part, I've been unloading and re-loading the dish washer, picking the family room pillows up off the floor and returning the favorite green throw to it's rightful place. *Sigh*

I always say my favorite day of the year is the last day of school. The nice weather, lack of schedule, relaxing on the porch instead of running and schlepping and checking homework. That said, every year I anticipate the first day of school. The weather is getting cooler, I crave a schedule and start to think about nesting and cuddling up indoors when the leaves begin to fall.

Imagine how excited I was to hear the hippest girl in homemaking is coming to the yellow house just in time for what I consider the peak of homemaking season. Kate Payne, the clever girl behind, The Hip Girl's Guide to Homemaking: Decorating, Dining and the Gratifying Pleasure of Self-Sufficiency: on a Budget is going to share a DIY kitchen project and sign her beautiful book at a house party.

It's so wonderful to see homemaking become something cool. Canning, sewing, gardening, sustainability and crafting.


If you haven't yet, get this book. It's full of wonderfully simple things that will warm the cockles of your heart - and those of the ones you love.

Saturday, August 6, 2011

Happy (Basil-Shallot) Mustard Day!

It's Mustard Day and to celebrate this should-be illustrious holiday, I am adding another installment to my series, The Basil Chronicles.

I have made mustard before and it's so easy it makes me wonder why I ever buy it since it's so delicious. This recipe also fulfills the requirement of late - basil. Only 3 tablespoons. Desperate times...baby steps....every little bit?


Everything I needed to make this oh-so versatile condiment was in the pantry so it came together quickly.


The only time consuming, though totally hands-off, aspect was the soaking of the mustard seeds in apple juice, water and vinegar. I think I let them go a bit longer than needed - maybe 8 or so hours?


Next, a quick spin through the food processor. In hindsight, I should have used a mini prep. I made only a single batch and the quantities weren't really enough to let the processor do it's job crushing up the softened seeds.

Cooking about 25 minutes over a double boiler, allowed the mustard to thicken. 


Next time I'll increase the cooking time for greater thickening and use a more appropriately sized means for crushing the seeds.

No big deal. After a flavor blending resting, my turkey sandwich didn't care one bit and neither did I.

And, I'm down 3 more tablespoons of basil.

*Sigh*

Basil-Shallot Mustard
The Big Book of Preserving the Harvest by Carol W. Costenbader

2/3 cup apple juice
2/3 cup red wine vinegar
1/2 cup dry mustard
1/3 cup water
1/4 cup light mustard seeds
3 T. fresh basil, chopped
2 T. shallots, minced
2 T. light brown sugar
1 t. salt
1/4 t. allspice

Combine the apple juice, vinegar, dry mustard, water, and mustard seeds in a glass or ceramic bowl and stir, mixing well.

Cover the bowl with plastic wrap and let stand for 4-6 hours, stirring occasionally.

Process the mixture in the bowl of a food processor until the mustard seeds are coarsely ground. (see notes above)

Cook the mixture in a double boiler over simmering water, adding the basil, shallots, sugar, salt, and allspice. cook for 20-25 minutes. The mustard will thicken as it cooks. (see notes above)

Pour into sterile jars. Cap and seal.

Allow the flavors to marry for 2-3 days before using. Will keep in the refrigerator for 2-3 month unopened.

Yield: 5 pints

Wednesday, August 3, 2011

The Basil Chronicles

At risk of sounding like an ingrate, I am having a basil issue. I planted 6 plants as I usually do, but this year I have bumper crop. An exceptionally large, continually growing-by-the-hour bumper crop of basil.

Of course, I've covered the pesto angle. There are 4 1/2 pints in the freezer and I know I'll have to make more to avoid waste but what else is gardener/cook to do? I thought others may be experiencing this problem (whaa~whaa) so I hit the books hard searching for ways to save this precious - and expensive - herb.

One of the most interesting things I came across was carefully layering the leaves in salt. My trial effort involved a small plastic container that's been stored in a lower kitchen cabinet though I've read to refrigerate.


Pretty much it wilted and darkened a bit. The leaves are still tender and hold up to a knife. While the salt doesn't take on any basil flavor (sort of a bummer-I'll be addressing that soon) it can also be returned to the salt box and used for other cooking. Thrifty.....


and brilliant. My plan is to address this project on a large scale at the end of the season. I'll tap my inner pioneer and salt pack the basil.

Then I'll slaughter the hog.

Wouldn't that just freak out the neighbors?

Tuesday, July 26, 2011

Making Probiotic Soda

Once again, Rebecca was kind enough to share one of her many skills and teach in the Nourish kitchen. This time - pro biotic sodas. My new favorite thing and current beverage addiction. (though those peach-rosemary rose spritzers were a pretty good sweltering day drink.)

Again, I got to sit on the opposite side of the counter and learn from a pro how to make my own natural soda. Full of 40 pro biotics, this fizzy beverage is not only good for your gut but tasty and really, really refreshing on a hot day.

The method is really easy and she shared three different ways to flavor your drinks. We also experimented with some of the many (many, many) fruit and herbal syrups I've been cranking out.


The fresh fruit version was made with wild blackberries Rebecca foraged herself. Love this woman.


And now we wait.


A few days later we are able to bottle it. This is a good way to recycle Grolsch and other clamp top bottles. Another few days on the counter then into the fridge.


Slightly sweet, bubbly refreshment on a ridiculously oppressive July day.


And then, I begin again.

Tuesday, July 12, 2011

Fermenting with Rebecca

In case you haven't realized, the internet is an amazing thing. Earlier this summer, I met Rebecca via a meet-up group connection and a shared interested in cheese making. Through conversation and email, Rebecca assisted a cheese making class I taught for Slow Food and then graciously agreed to teach a fermentation class for Nourish. Neat, huh?

I have always wanted to learn this art but was a bit intimidated to work with live foods. To have an expert teach me was just what I needed to encourage me.
 

It was fun to be on the other side of the counter for this class. I just had to collect the ingredients and equipment.


And prepare many mason jars.


Rebecca is a delight and just as passionate about all things food as I am. We could talk all day!


Many ferments start with whey and for our class, she made raw milk yogurt and drained the whey - away. (ha!)


Above, Mary is hiding behind her straight pin turned cabbage pounder.


We added caraway to our sauerkaut before pressing it into jars. The trick to a no-mold fermentation? Weighting the product with a ziploc bag of water during the week long process. I love tips from a pro.


After tasting we made ginger-carrots, beet kvass and sauerkraut. They were all delicious foods that make you feel like you're doing something really wonderful for your health. Bonus-they are delicious!

It was so wonderful of Rebecca to share her knowledge with me. In addition to being a fermented foodie, she is a compulsive food preserver, cheese maker, farm girl, beekeeper and soap maker. A woman after my own heart. You really must check out Rebecca's website to purchase her products. Follow the blog and read all about forays in her many, many other passions.

Thank you world wide web for bringing me Rebecca!

Sunday, July 10, 2011

Two New Favorites

Look what came in the mail Wednesday? I love Amazon. They always seem to know exactly what I want.

I came across Alice's Cook Book by Alice Hart at the library and 5 pages in I was so enthralled I knew I wanted needed to own it. Side note: It was in the house for about an hour before someone aka "I didn't do it" smudged the cover with greasy, dirty fingers. I am trying not to obsess. Anyway, the book is divided into seasons and within season fun ways to entertain. A Bun Supper, Picnics and Happy Camping. Oat Cakes with Ham and Gruyere, Pomegranate Gelatin (big resurgence right now) and Roasted Carrot Hummus. Also, I love the vintage oil cloth inspired spine. It's Amazon.com by the way....


Can It, Bottle It, Smoke It by Karen Solomon is the second book geared towards those of use in dire need of making our own hot dogs, Worcestershire sauce and pickling - everything. I love it and am excited to see new project ideas we have yet to attempt or dream up on our own. Makes my heart go pitter-patter.

Definitely look them up if you aren't muttering how insane the yellow house inhabitants are becoming. Most importantly, check back to see the progress we've made in making our own hot dogs. (Do I sense an Ultimate Hot Dog Project coming on?)

Perhaps you should subscribe? I'd be so grateful.

Sunday, June 19, 2011

Hittin' The Big Time

(L-R) really hot, fresh hot, stupid hot and full flavored sneaky hot

Sometimes things just go well. The stars are aligned and if only for a fleeting moment, you think "Wow, this could really happen." We're having one of those moments in the yellow house. If you're not up to date on this fabulous project (ahem, Little Lesley), you can pick up the history here.

After working long and hard on his food business, Double D's Sauces, Doug has turned a corner - a big corner with lots of traffic. A new grocery store opening two locations in Chicago in the coming months will be carrying a variety of Doug's products on their shelves. Needless to say, he has been very busy hammering out the details of the website, packaging, printing, marketing and e-commerce.

Urban Orchard, with soon-to-be locations in Westown and Andersonville, is a terrific and timely concept bringing you  fresh, local produce and the best of hand produced foods.  They've partnered with farmers and food artisans in Wisconsin, Michigan and Indiana which means farmer market access 7-days a week . Lucky Chicagoans.

A unique spice blend, Wingman. Unlike your friends, it's always got your back.
Additionally, Doug was interviewed for a chili lover's website and it was posted on Wednesday. Check it out here to learn more about this A-typical chili head and his thoughts on sauces.

His products are truly delicious and not just because I'm to married the man behind the bottle. There are hours of time and testing in each recipe. He is finicky about his ingredients and much thought goes into the clever tag lines. It's made in small batches and each bottle is hand-filled and labeled. This is his passion.

Some days, passion is what drags us out of bed and some days we are lucky it still clings to us as we fall back in at day's end. Perhaps I am naive (and if so I am okay with that) but with passion eventually all the rest falls into place.

Friday, May 27, 2011

The Ultimate Taco Project - Holy Horchata!

It's hard to believe The Ultimate Burger Project of 2009 began almost 2 years ago. The project was based upon building the best burger from scratch - bun, condiments and freshly ground beef. I had really hoped for a follow up project last year but nothing inspired me and then last winter it came to me - tacos. We love Mexican food and experiment with a lot of different types so this is the perfect topic.

My project began months back with hand made corn tortillas. Successful, delicious and pretty straight forward, the perfect place to start. Shortly thereafter, I pursued horchata. Again thinking it would be easy, too I found that it took a bit of research to find the horchata of my dreams.

Many years ago, I was taken to a Mexican joint in the city, off Division if memory serves. I was too young to really appreciate how great the food probably was, but what I do remember was the horchata. It was dipped out of a big rectangular cooler with a cup and poured into the cup I would eventually drink from - gross. It sort of skeeved me out but then I tasted it - I couldn't be rude - it was wonderful. Sweet with a slight cinnamon essence and the perfect cooling refreshment with spicy food. This horchata has been the earmark for all other.

The recipe calls for rice flour or ground raw rice. After a few seconds of grinding in the VitaMix - rice flour. Technically, I wouldn't call what I made flour, it was a bit more coarse than that. After my first experimentation though, I found too finely ground, it wound up as gritty sediment in the glass. Some texture is good, too gritty is icky.

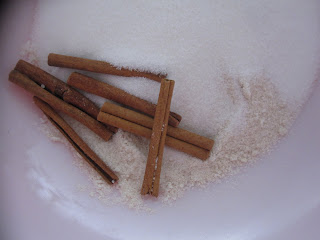
Other ingredients, include milk, sugar, cinnamon sticks and vanilla extract.


I think what gives this rice milk great flavor and body is the cow's milk reduced over low heat by half. Since I tend to be a bit neurotic. I like to mark a skewer before adding the flame so I can see when it's reduced enough by checking the skewer. Clever or crazy?

Water, reduced milk and cinnamon sticks are brought to a boil and allow to set while the cinnamon infuses the mix. Add in the sugar, rice flour and vanilla to the mix and refrigerate for at least 4 hours.

It's delicious and just what I was searching for - what are the chances the second recipe would hit the mark? I like to think it comes from many years of recipe reading.

The last time I served horchata one recipe was gone within the hour.

This time I doubled the batch. They all asked why I made so much.

Maybe I should sell some from a cooler....

Horchata
Mary Sue Milliken & Susan Feniger (remember the Two Hot Tamales?)

1 quart non-fat milk
2 quarts water
4 cinnamon sticks
1/4 cup rice flour or 1/3 cup raw white rice crushed to a powder in a blender
3/4 cup sugar
1 T. vanilla extract

Pour the milk into a wide skillet and bring to a boil. Reduce to a simmer and cook, stirring frequently, until reduced by half. Strain into a large saucepan and add the water and cinnamon sticks.

Bring to a boil, reduce to a simmer and cook 5 minutes. Remove from the heat and let sit 15 minutes. Remove the cinnamon sticks and reserve.

Combine the rice flour, sugar, and vanilla in a bowl. Pour the milk mixture and whisk to incorporate well. Refrigerate at least 4 hours. Then pour the liquid into a pitcher, discarding the sediment that has settled on the bottom of the bowl. Serve cold over ice with cinnamon sticks at stirrers.

Thursday, March 24, 2011

Miscellany and Martha


Usually with a fair amount of regularity I purge the house of unwanted miscellany. Clutter makes me crazy, probably unnaturally so. I spend a lot of time at the Goodwill drive thru and make regular trips to my local clothes closet to donate to those in need. More often than not the back of my truck is filled with stuff to take other places - donations to the library, clothes to take the kids' resale shop, etc. Unfortunately often times my truck is full when I need it and groceries go on the seats or I have to unload only to reload later. I digress...

About a week ago, I was going through things to recycle - catalogs, school mail and an Everyday Food from March of this year, that didn't have much of interest to me. I took one last run through before pitching it and I am so glad I did. Four words:

Pineapple-Ginger Infused Rum. That Martha.


I had a pineapple I bought the day before - one of those cheater ones that's nicely cored from the grocery store. It was on sale. I stuffed it into a jar.


In goes the dark rum and about 1" of peeled fresh ginger cut into slices and the whole thing gets put in the fridge.


And now we wait for 2 weeks but I think infused alcohol only gets better with time. The recipe suggested using the pineapple as a drink garnish. I am thinking pineapple upside down cake.

I know some day soon, it'll be a lovely, warm spring day and to pay homage to the summer to come Doug and I will enjoy a really wonderful pina colada.

Try this yourself. The waiting is the hardest part.